

We love our animal friends. In fact, the majority of Aussie households own at least one pet. Dogs are the most popular making up around 40% of all pets!
Want to show your little mate how much you love them? You can always buy them extra treats, make them a nice microwave heat pack for when it gets cold, or best of all, give their home a makeover fit for a king or queen.
We’ve got tons of inspiration for customising your dog kennel. Keep reading to learn how to keep your pup in style!
Always be Pet Safe
Before we give you ideas for painting your kennel, let’s address safety. Always use pet-safe paints and materials when DIYing their home.
Remember, your dog will be breathing those paint and varnish fumes in close range. Their skin will be in contact with the materials too.
They can possibly chew and ingest anything you put on their home. Check the label or do online research to make sure you use suitable materials.
Consider the Conditions
Another thing to think about when painting your pup’s home is the kind of weather conditions their kennel will be in.
This isn’t an issue if you keep your pet indoors. However, with outdoor homes, you’ll have to consider the materials you want to use.
For example, painting an outdoor home black absorbs heat and painting it white reflects light. Plus, the paint you choose has to withstand Mother Nature.
BACK TO BASICS

Photo credit: @amelia_does_diy
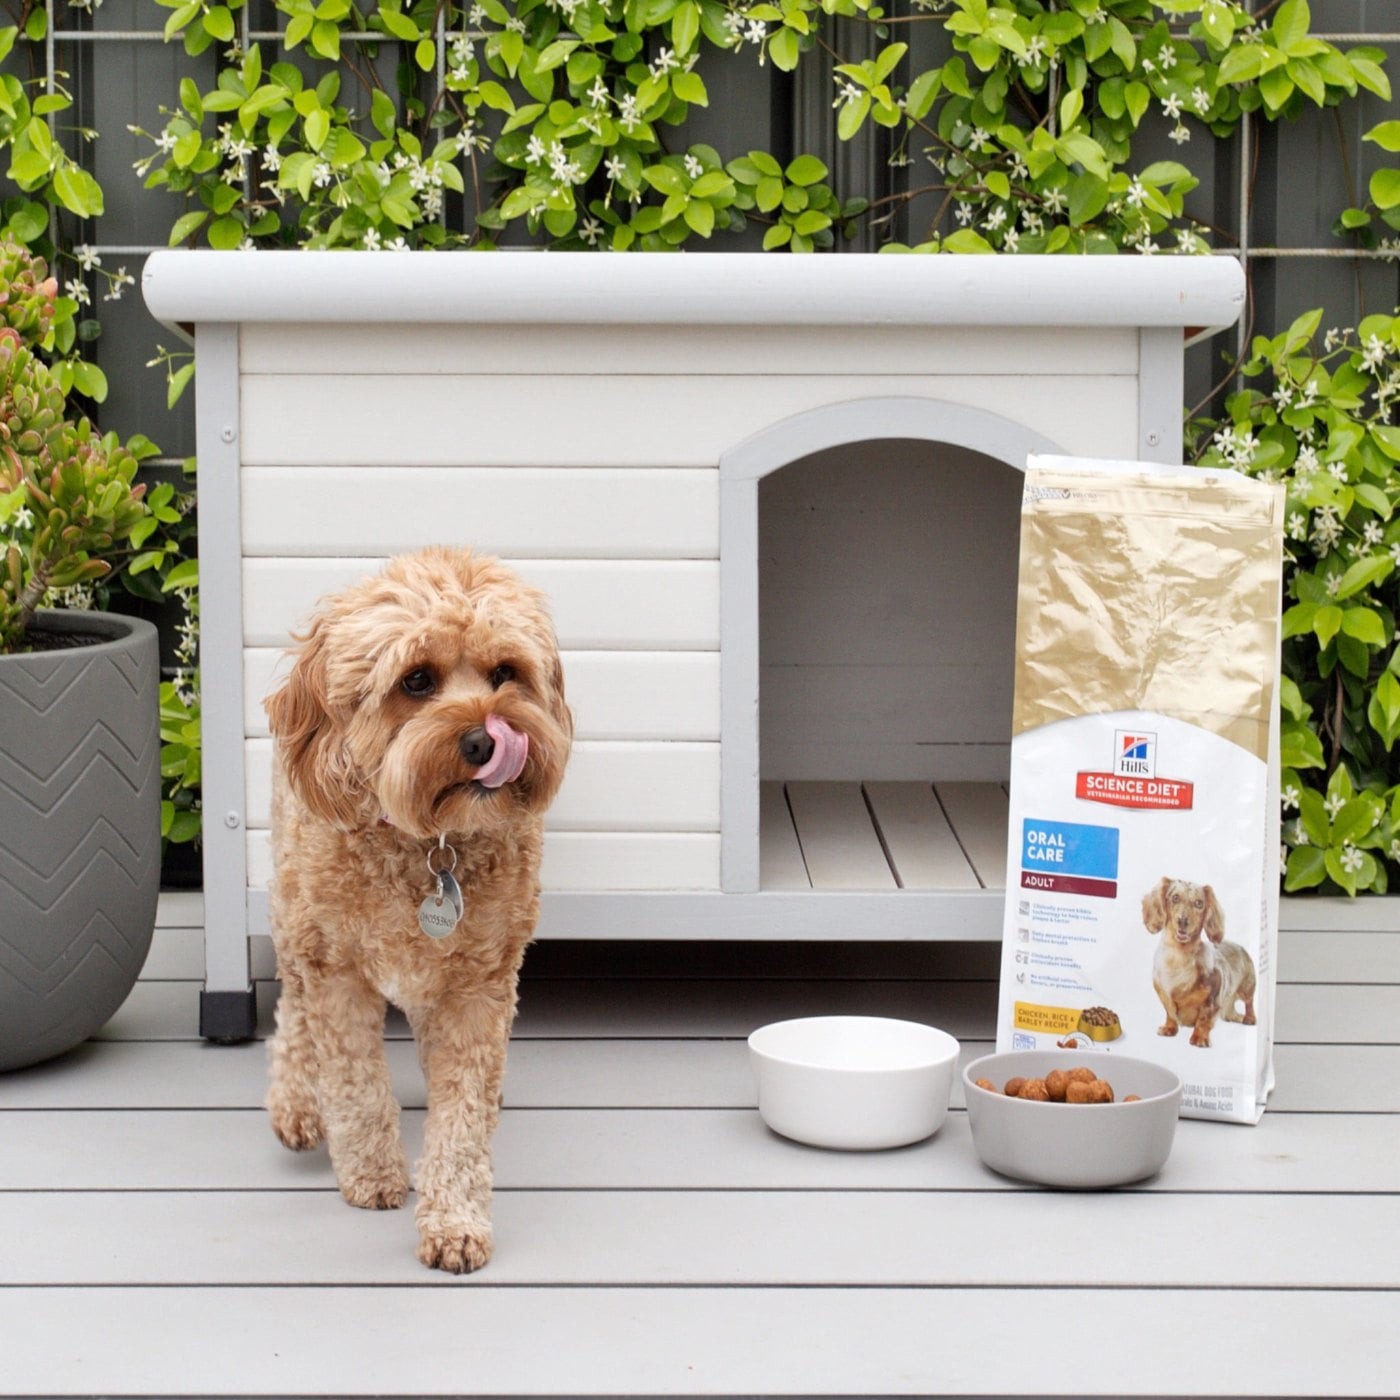
Photo credit: @hausofcruze
BRIGHTON BATHING BOX
Let your dog feel like they’re always on holiday with their very own beach box house.
Paint the body of your dog house in a teal colour leaving all the trims and door frame. Once the paint has dried tape around the trims and door frame and paint them white. Wanting something a bit more colourful? Take inspiration from Brighton’s Beach Boxes and go with contrasting block colours. Now your pup can enjoy their very own Brighton Bathing Box from the comfort of home.
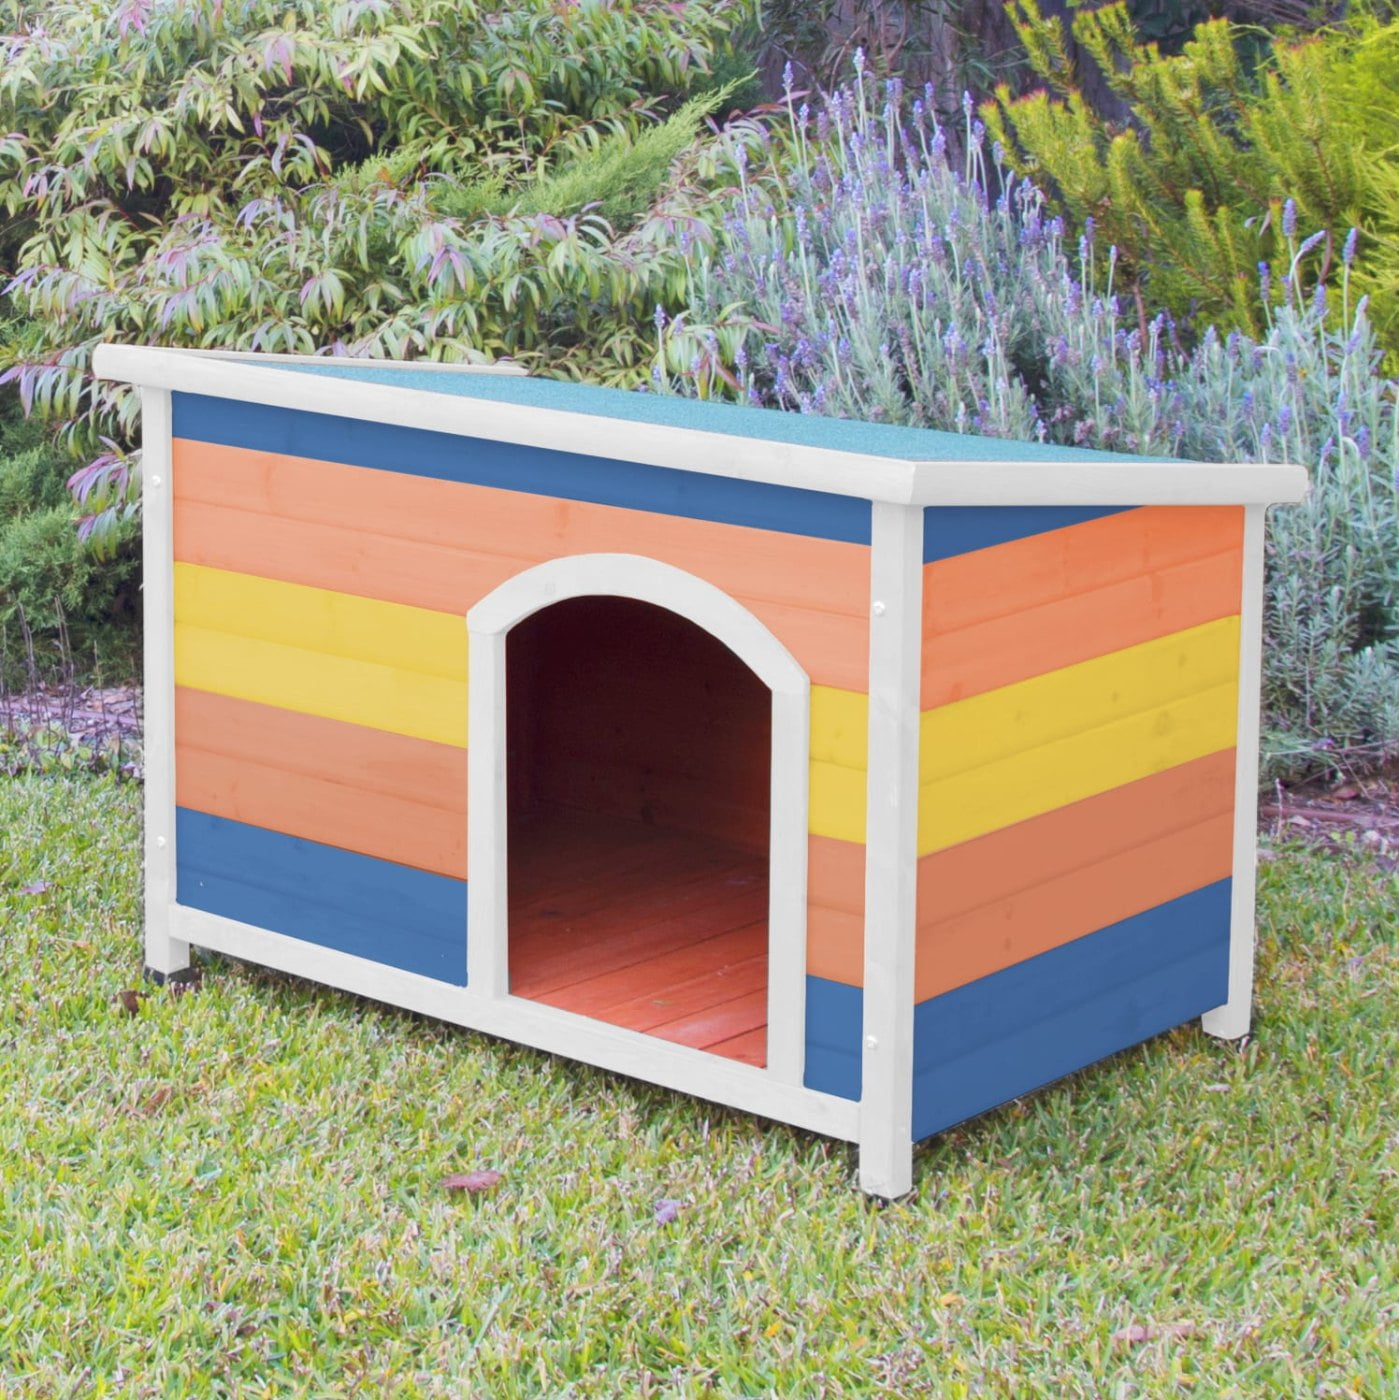
CHIC STRIPES
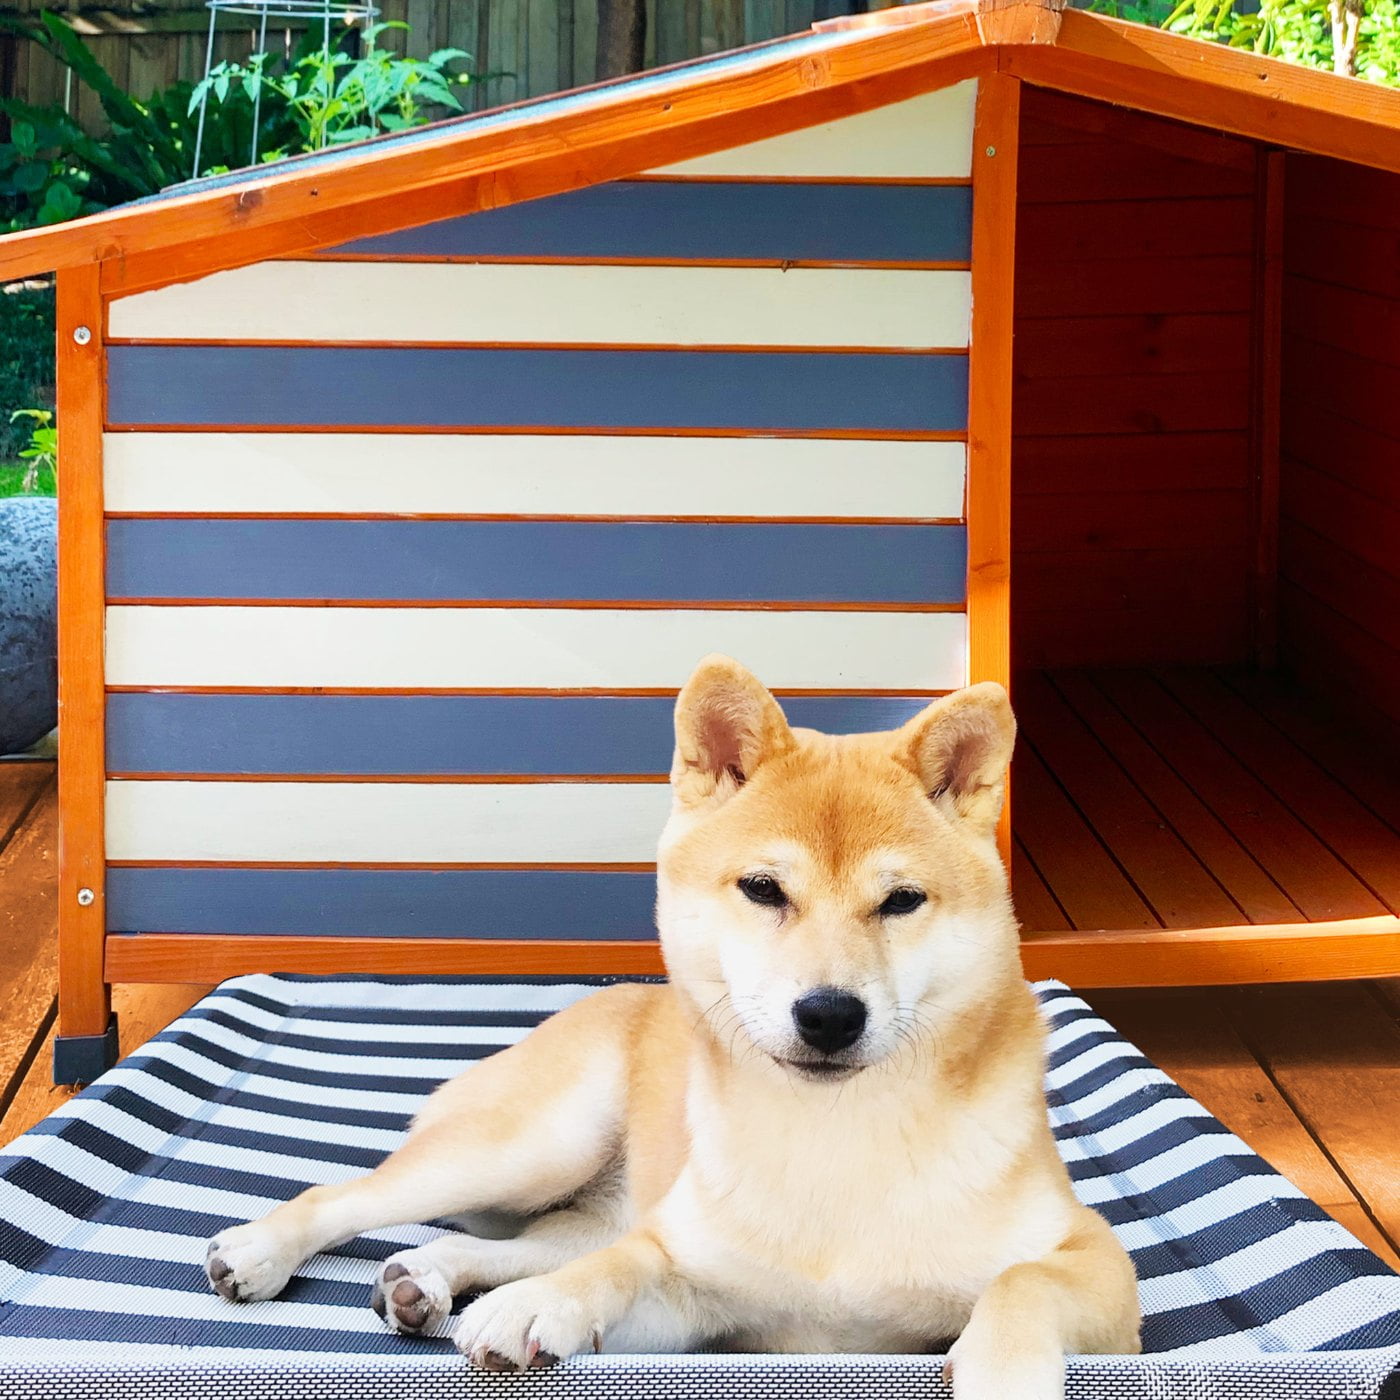
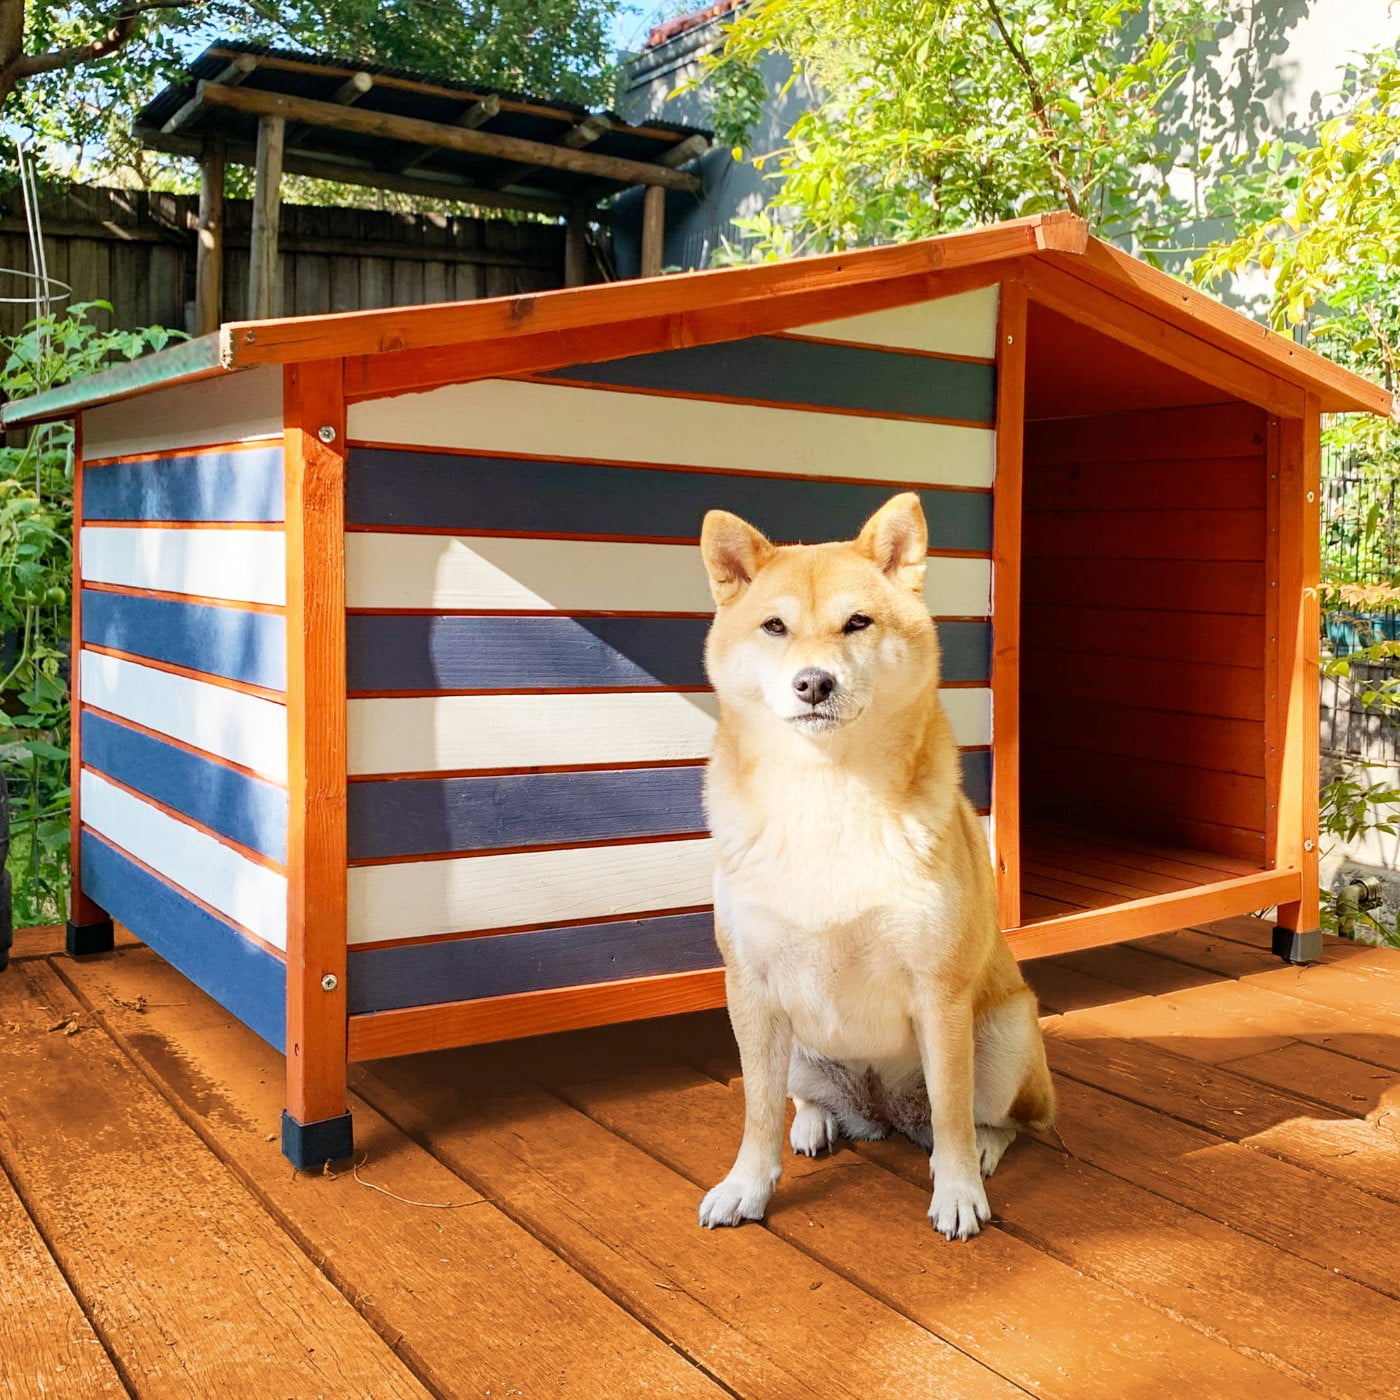
Can’t decide on a single colour? Go with multiple and do stripes.
Start with the lightest colour as a base and let it dry. Tape off sections and paint the darker colour/s over them.
You can mix and match different colours; use different shades of one colour for a monochromatic aesthetic or use opposite colours for a bold and daring look. Use any colours you like as long as you start with the lighter colour first.
TINY HOME
If you have an outdoor dog house, why not paint it to match yours? Paint the dog house the main colour of your own house and match the trim and the front door colour for a mini version of your place.
You can invert your home’s colours or stick within the same colour family. No matter what, have fun and get creative.

BUILD YOUR DOG KENNEL
All of our dog kennels come with instructions to guide you through the assembly process. Whether you have a Chihuahua or a German Shepherd, our range of kennels is sure to make your four-legged friend feel at home and comfortable.

Once you have acquired your chosen kennel, ensure you are assembling it in an area with enough space.

For this kennel, you will need a drill with a Phillips-head bit and/or a Philips-head screwdriver and a wrench.

Familiarise yourself with all the components, and then follow the instructions provided in the box to assemble your kennel.
PAINT YOUR DOG KENNEL
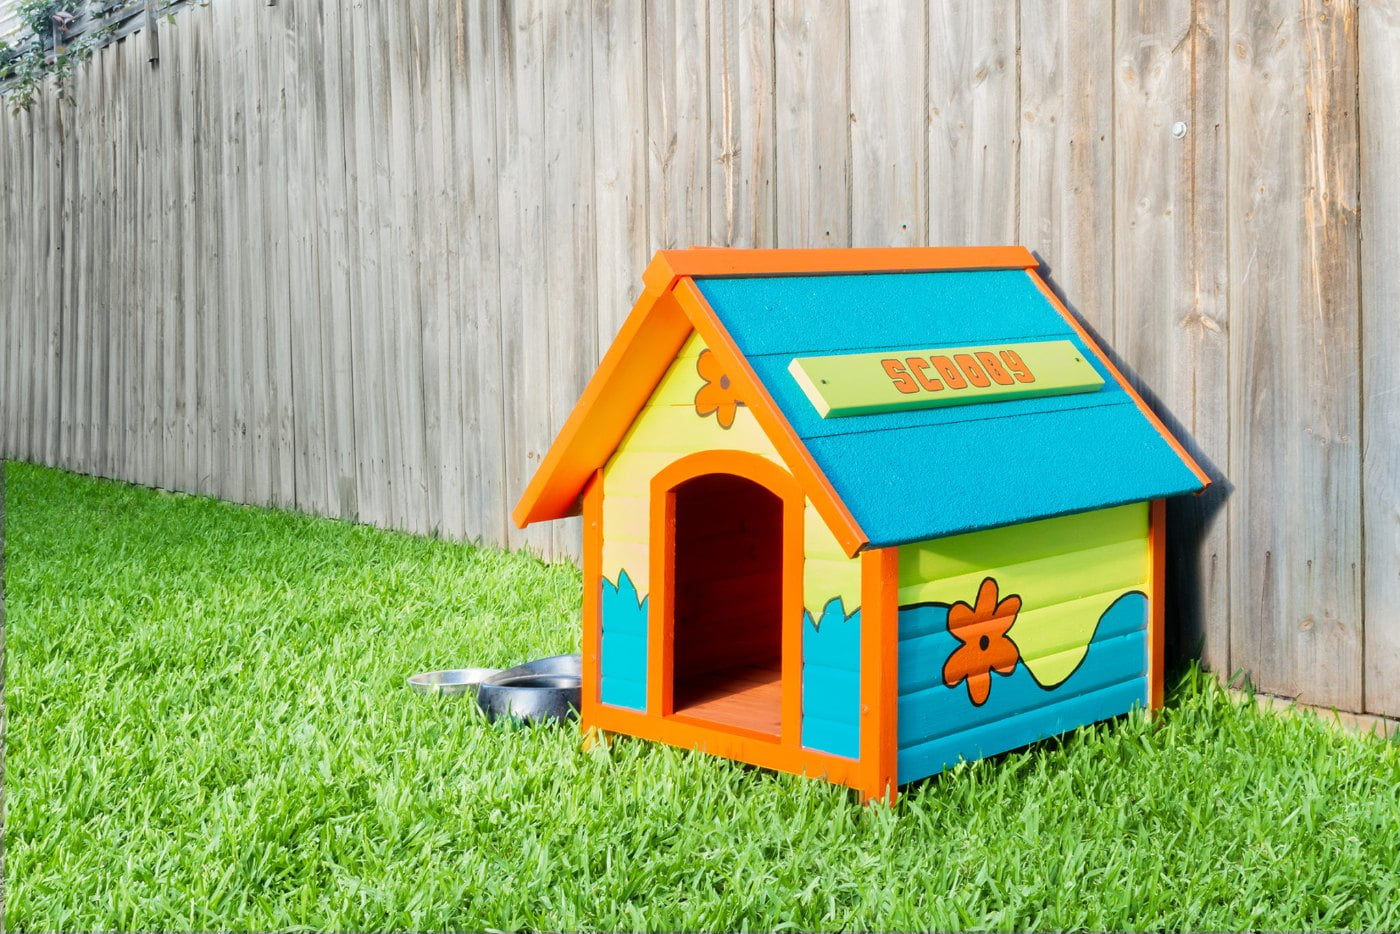
The Scooby Doo Mystery Machine!
Is your dog’s hero Scooby Doo? If so, why not spoil them with their very own Mystery Machine Kennel? You can do just that by following the steps below.

TOOLS REQUIRED: Paint primer, Selected paint colours*, Paint roller, Paint brushes (various sizes), Paint tray, Painter’s tape, Black Paint Marker, Drop sheet.
* If you would like to use the exact colours used in this project, use the names/codes below:
Taubmans Tapestry Teal (T15 153.6), Electricity (T15 175.5) and Rum Orange (T12 21.H2).
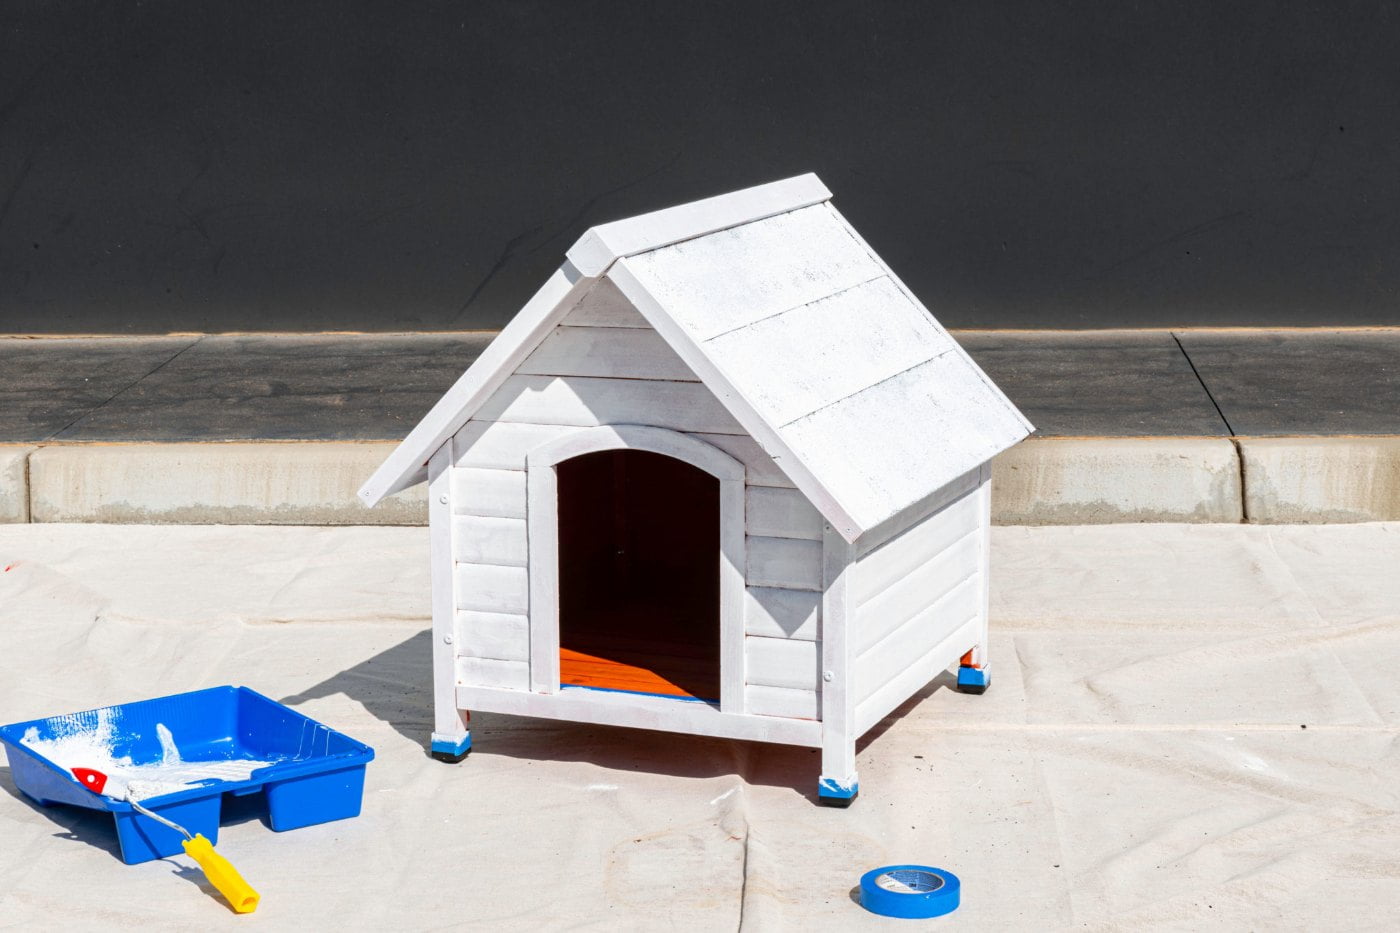
STEP 1: Start by masking the plastic feet so they stay clean while you paint. Give your kennel an undercoat of paint primer. We used a primer from Bunnings; if you are unsure of which one to get just ask a Bunnings team member from the paint department.
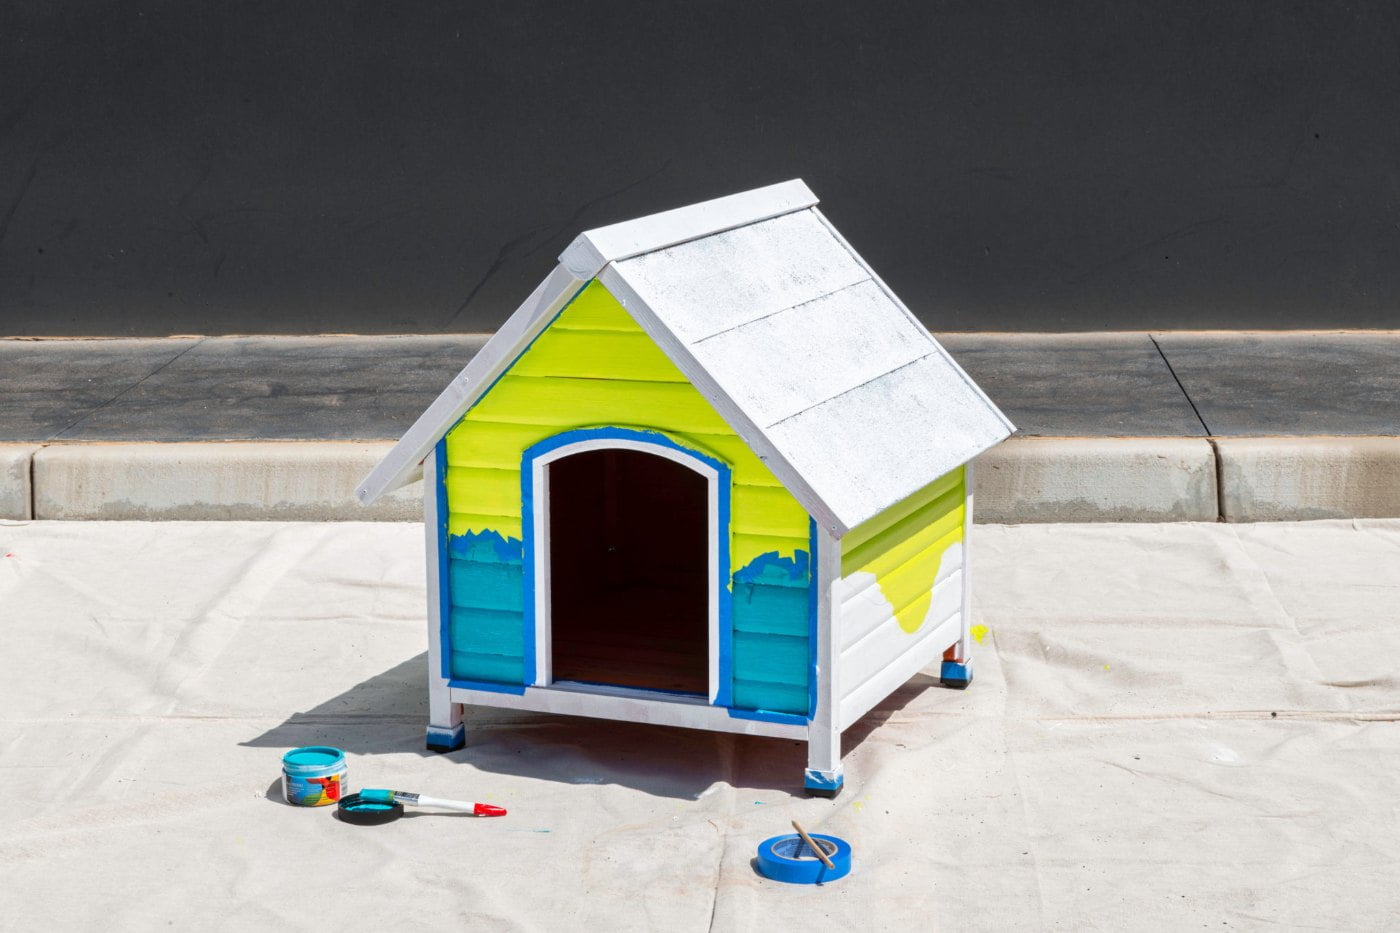
STEP 2: Begin with the lightest coloured paint and work your way to the darkest. We recommend using a painters tape to mark out any details or shapes.
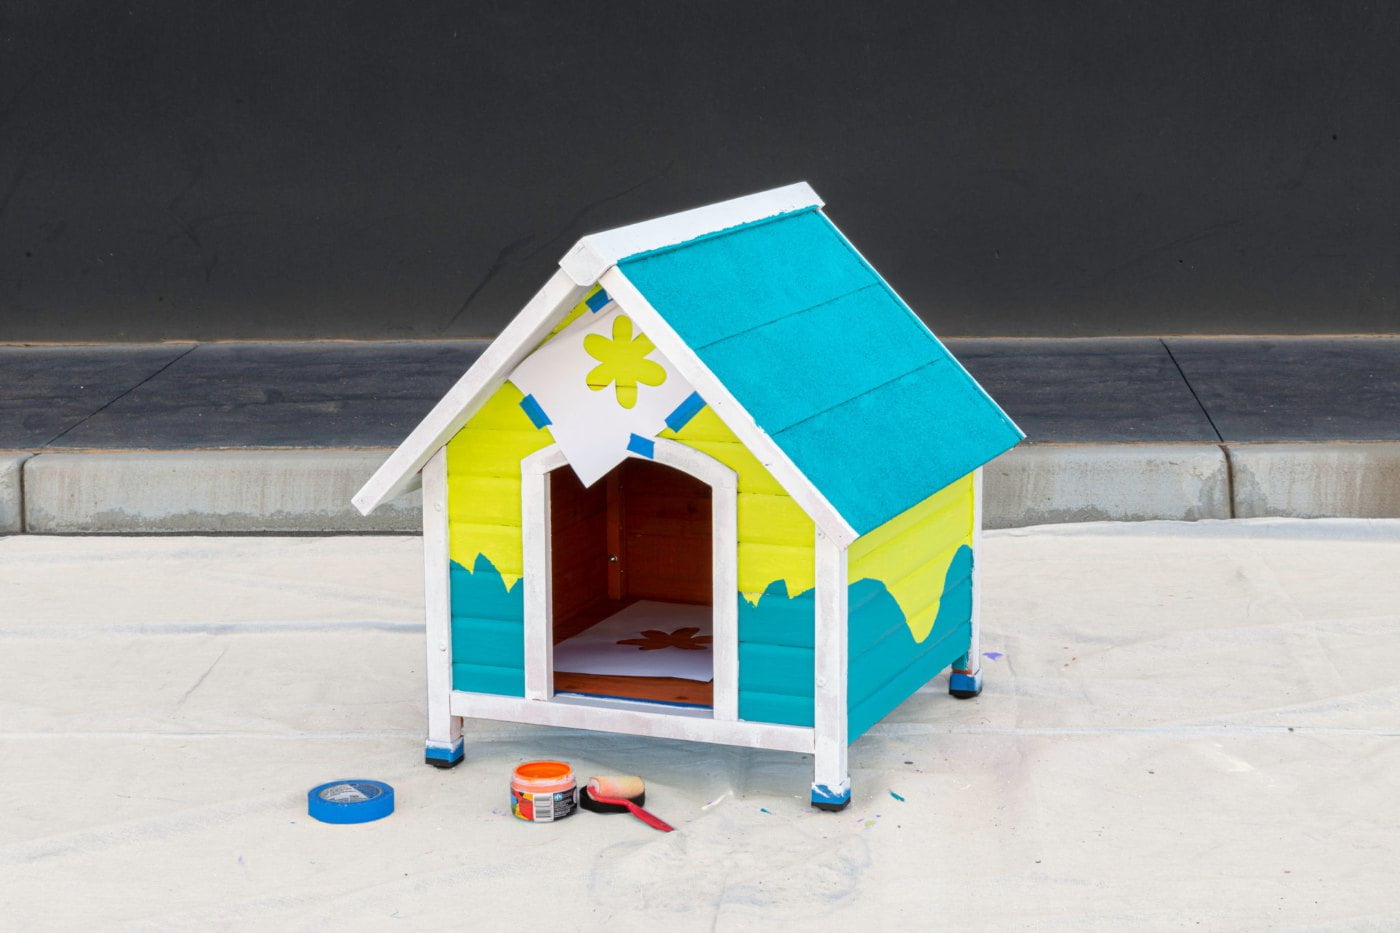
STEP 3: For any larger shapes or patterns, print and cut out stencils to help your accuracy. Alternatively, you can paint free-handed.
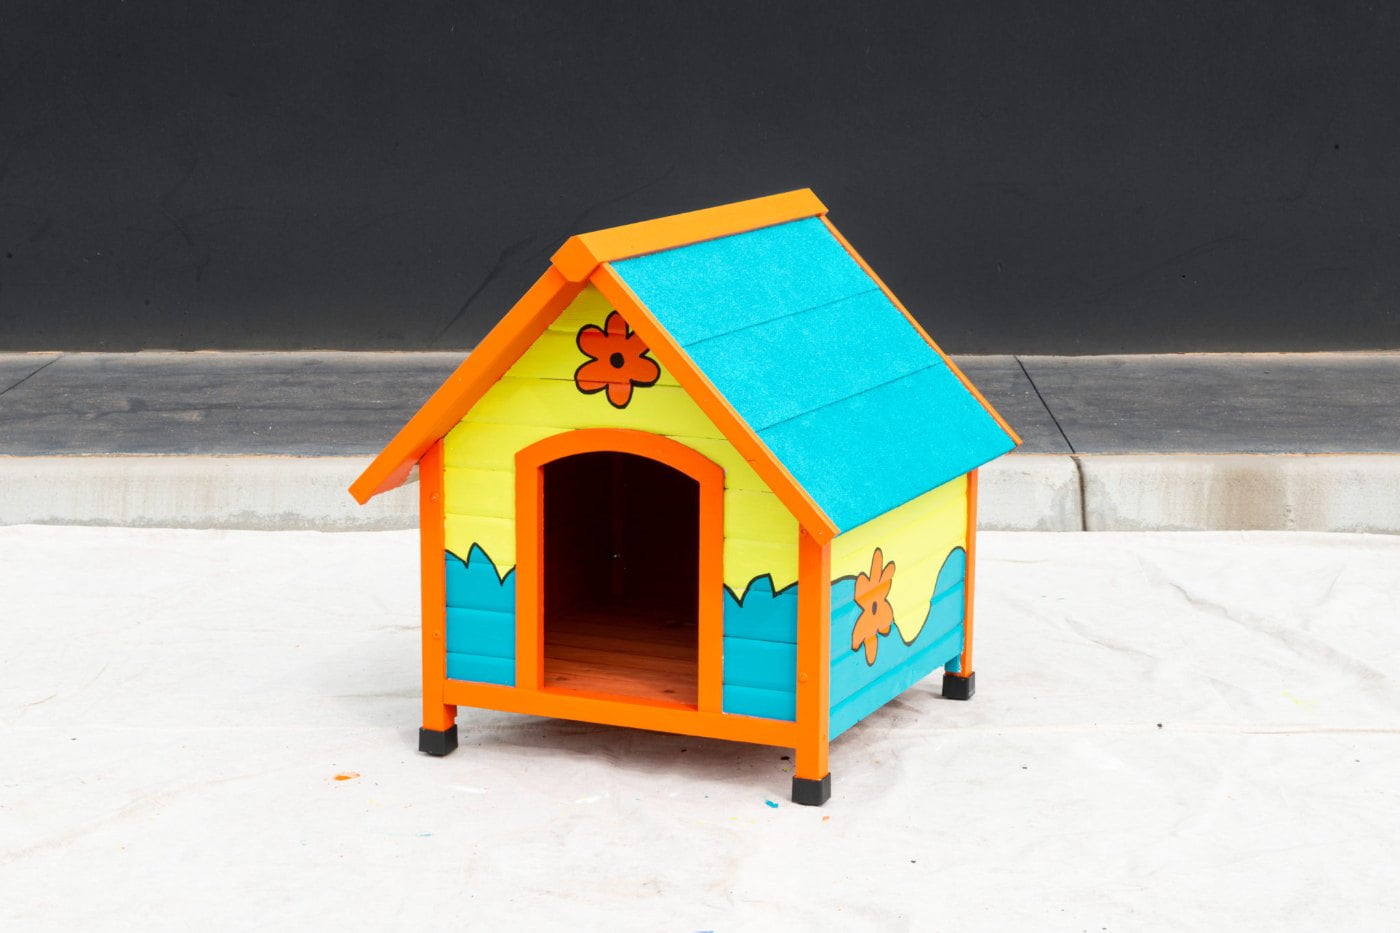
STEP 4: Once all the paint has dried, tape around the trims and paint in your chosen colour. Wait until all the paint dries, then outline all the shapes with a black paint marker to hide untidy edges and add definition.

STEP 5: Finally, add the name of your dog using a stencil printout and fix it to the roof of the kennel. We painted some timber cut-offs and fixed them on the roof for added style.
